Updating the Valve Name using Aquana Mobile
This article will walk you through the steps for changing the name of an Aquana Smart Valve. This often occurs during the initial installation of the valve as the Device Name is typically set to something like a service address or apartment number.
- You will need to be within Bluetooth range of the device you wish to update with this process. Enter your email and password, then tap on Sign in to log in to the Aquana Mobile App.

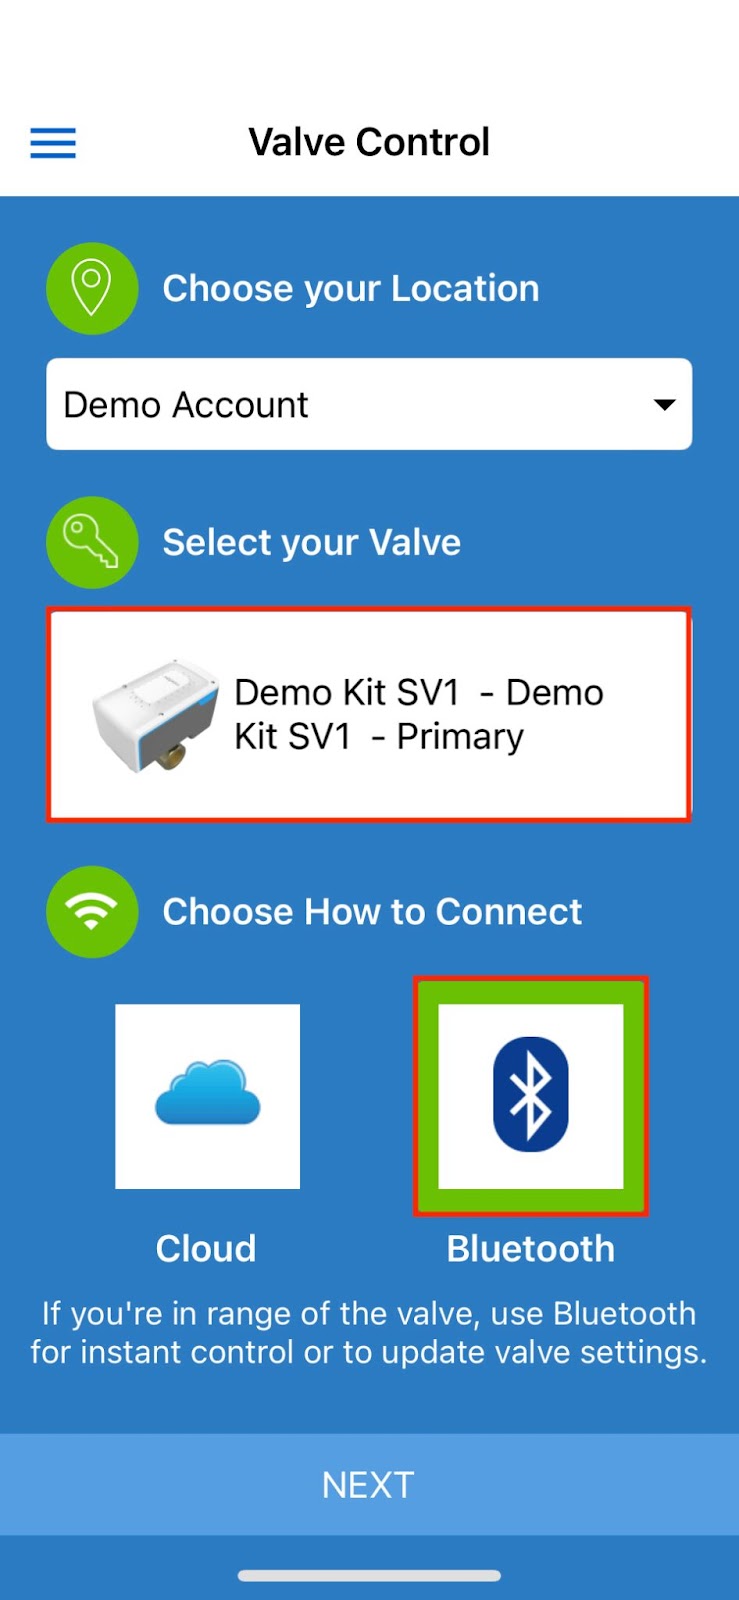
- Tap in the Select your Valve box and select the valve that you are renaming. Tap on the box labeled Bluetooth, and tap on Next at the bottom of the screen to connect to the valve.

- This will take you to the Valve Control screen. Wait for the mobile app to scan the valve and read the current data on the valve. When this is complete, UPDATE POSITION will appear at the bottom of the screen. Tap on the Configure button at the top right of the screen.

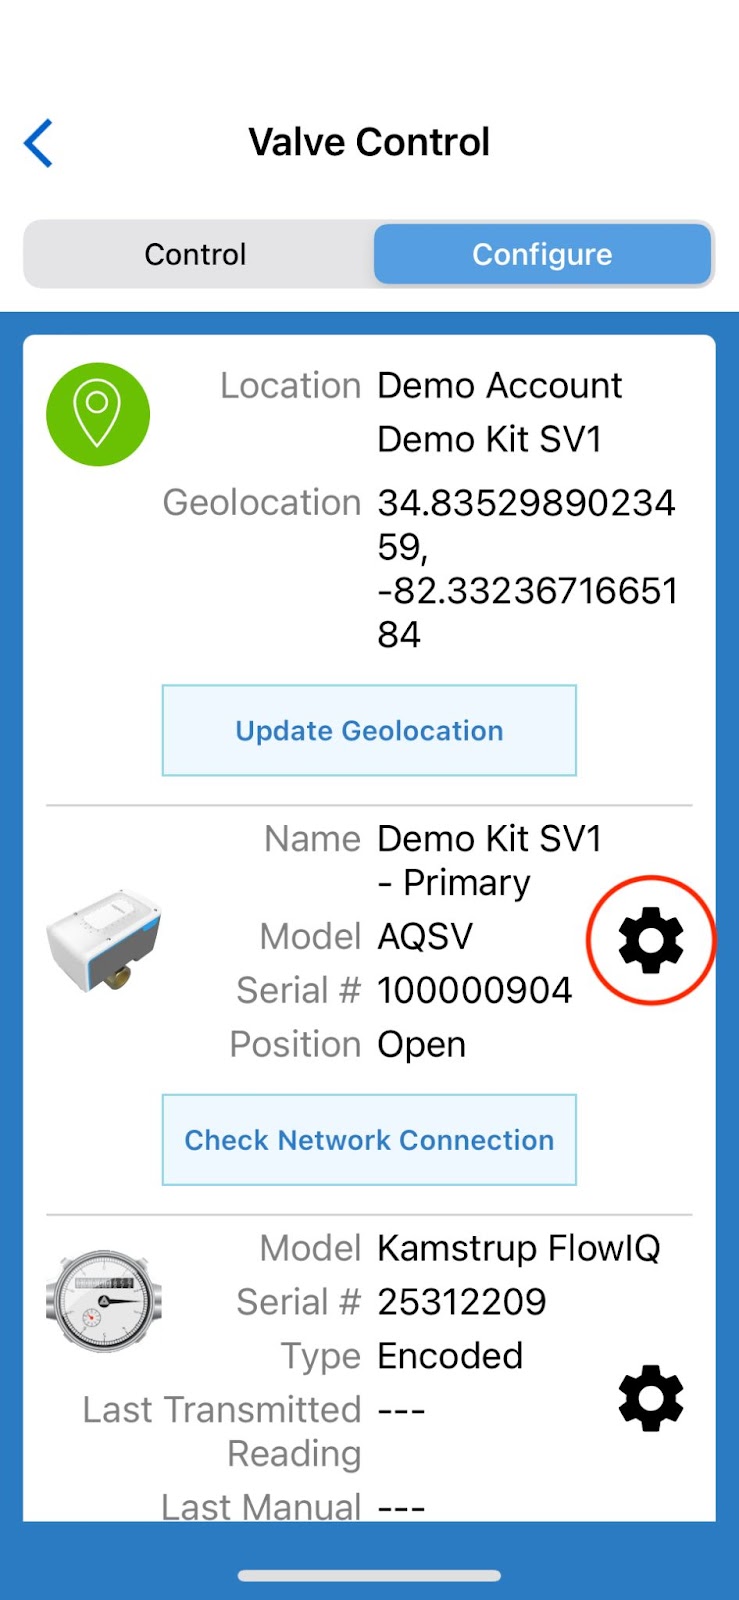
- This will take you to the Configure screen within Valve Control. Once there, tap the black gear icon toward the middle of the screen.

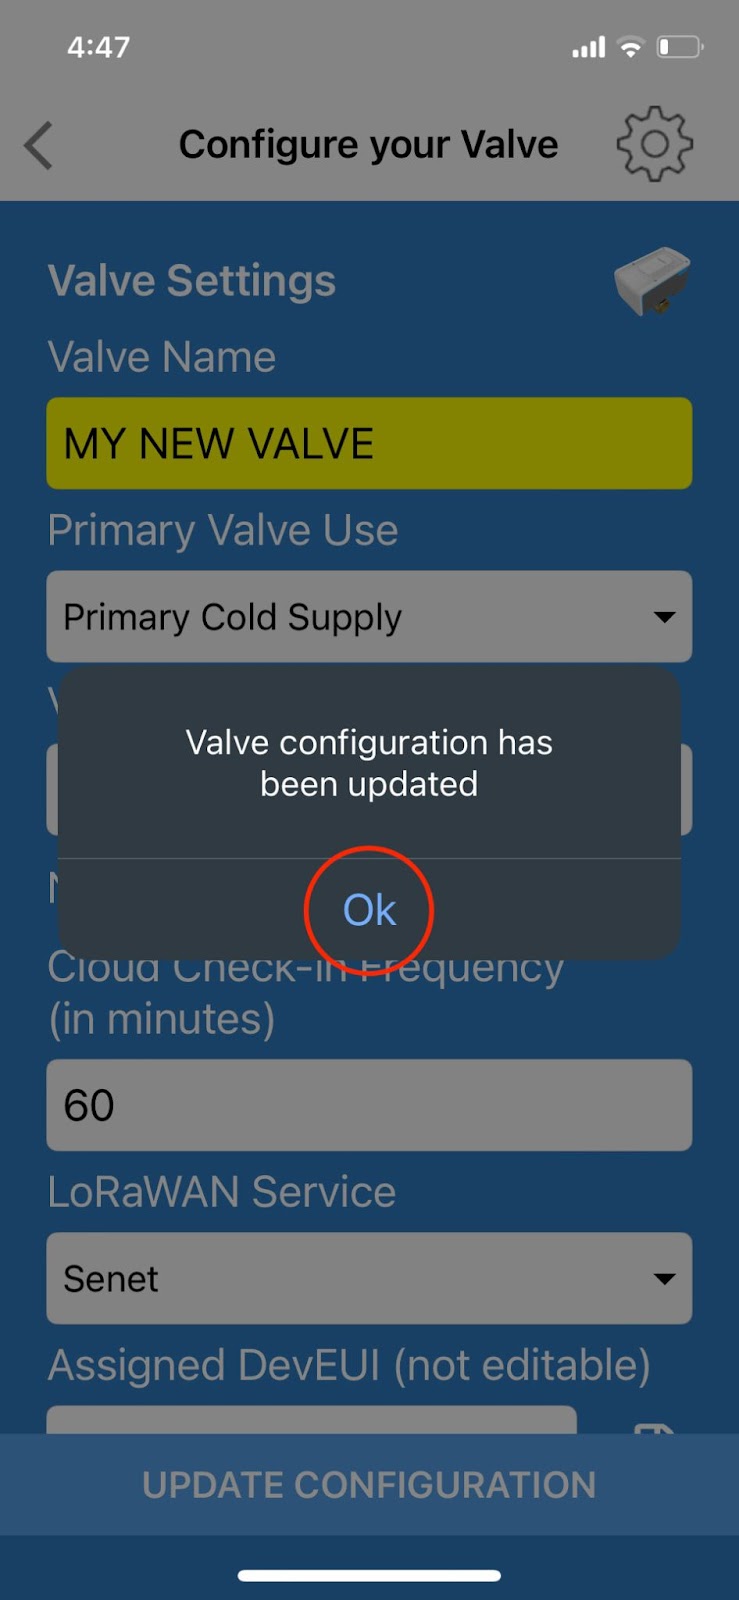
- This will take you to the first screen of valve configuration settings. Tap in the Valve Name box at the top and enter the new name for the valve. Then tap on UPDATE CONFIGURATION at the bottom of the screen.

- The app will show Updating... at the bottom of the screen, and then you should see the screen below indicating the valve configuration was successfully updated. Tap Ok.

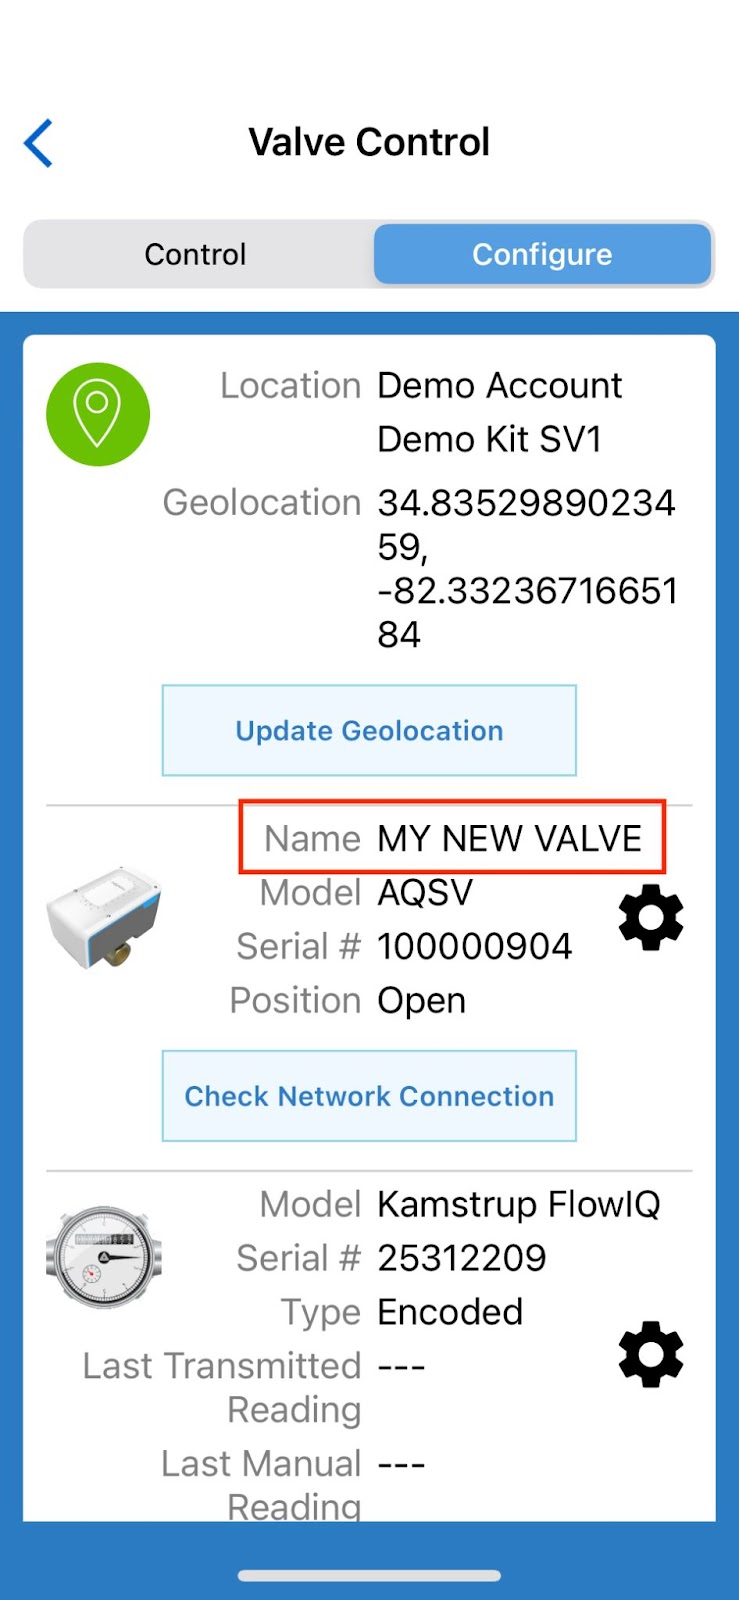
- You will see the new valve name represented here:

